Samantha Green

Samantha Green is a passionate horticulturist and garden enthusiast. With a degree in Botany and years of hands-on experience, she brings a deep understanding of plant biology and gardening techniques to her writing. Samantha's love for nature and her green thumb drive her to explore various gardening tools, including garden saws. Her articles provide practical tips, expert advice, and detailed reviews to help readers choose the best garden saws for their specific gardening needs. Samantha's goal is to inspire and empower gardeners of all levels to create beautiful and thriving gardens.

How to Grow and Care for Cauliflower

Introduction

Cauliflower is a versatile and nutritious vegetable that can be enjoyed in various culinary dishes. Growing and caring for cauliflower in your garden is a rewarding experience that allows you to enjoy the freshest and most flavorful heads of this cruciferous vegetable. In this article, we will provide you with a comprehensive guide on how to grow and care for cauliflower, including step-by-step instructions, answers to frequently asked questions, and some final thoughts to help you achieve a successful harvest.

How to Grow and Care for Cauliflower

  • Choosing the Right Variety:

Select a cauliflower variety that is suitable for your climate and growing conditions. Consider factors such as heat tolerance, maturity period, and head size.

Popular cauliflower varieties include Snowball, Purple Cape, Romanesco, and Cheddar.

  • Planting Cauliflower:

Cauliflower is a cool-season crop, so it is best to start seeds indoors 6-8 weeks before the last expected frost date in your area. Alternatively, you can purchase transplants from a local nursery.

Prepare the soil by adding compost or well-rotted manure to improve fertility and drainage. Cauliflower prefers a slightly acidic soil with a pH level between 6.0 and 7.0.

Plant the seedlings or transplants in a sunny location with at least 6 hours of direct sunlight per day. Space the plants about 18-24 inches (45-60 cm) apart, allowing enough room for their heads to develop.

  • Watering and Mulching:

Cauliflower plants require consistent moisture throughout the growing season. Water deeply and regularly, ensuring the soil remains evenly moist. Avoid overwatering, as it can lead to root rot.

Applying a layer of organic mulch, such as straw or shredded leaves, around the plants helps retain soil moisture, suppress weeds, and regulate soil temperature.

  • Fertilizing:

Before planting, incorporate a balanced, slow-release fertilizer into the soil according to package instructions. This will provide essential nutrients for the cauliflower plants.

Once the plants have established, side-dress them with a nitrogen-rich fertilizer, such as blood meal or fish emulsion, every 3-4 weeks to promote healthy growth.

  • Protecting from Pests and Diseases:

Cauliflower is susceptible to certain pests, including aphids, cabbage loopers, and cabbage worms. Monitor your plants regularly and take appropriate measures, such as applying organic insecticides or using row covers, to protect them.

Common cauliflower diseases include clubroot and downy mildew. Practice crop rotation and ensure good air circulation around the plants to minimize the risk of these diseases.

Frequently Asked Questions (FAQs)

Q1: When is the best time to grow cauliflower?

A1: Cauliflower is a cool-season crop and grows best in spring or fall when temperatures are cooler. Start seeds indoors 6-8 weeks before the last expected frost date or purchase transplants for outdoor planting.

Q2: How long does it take for cauliflower to mature?

A2: The time to maturity for cauliflower varies depending on the variety, but it generally ranges from 60 to 100 days from transplanting.

Q3: How do I know when cauliflower is ready to harvest?

A3: Cauliflower is ready to harvest when the heads reach a mature size and have a firm texture. The heads should be dense and compact, with tight curds. Harvest before the heads start to separate or discolor.

Q4: Can I grow cauliflower in containers?

A4: Yes, cauliflower can be grown in containers. Choose a large container with good drainage and use a well-draining potting mix. Provide adequate sunlight and water regularly.

Final Thoughts

Growing and caring for cauliflower requires attention to detail, but the effort is rewarded with a delicious and nutritious vegetable. By following the steps outlined above, you can successfully cultivate cauliflower in your garden. Remember to choose the right variety, provide adequate water and nutrients, protect the plants from pests and diseases, and harvest the heads at the appropriate time. Enjoy the satisfaction of growing your own cauliflower and incorporating it into your favorite recipes.

How to Grow and Harvest Blueberries

Overview

Growing your own blueberries is a rewarding experience that allows you to enjoy these delicious and nutritious fruits right from your backyard. Blueberries are relatively easy to grow, and with proper care, you can have a bountiful harvest of sweet and juicy berries. In this article, we will provide a comprehensive guide on how to grow and harvest blueberries successfully, including step-by-step instructions and valuable gardeners’ notes.

Step-by-Step Guide to Growing and Harvesting Blueberries

Selecting Blueberry Varieties:

  • Choose blueberry varieties that are well-suited to your climate and growing conditions. Consider factors such as chilling requirements, disease resistance, and desired fruit characteristics.

Planting Blueberry Bushes:

  • Choose a sunny location with well-draining soil and a pH level between 4.5 and 5.5. Dig a hole twice the size of the root ball and amend the soil with organic matter, such as compost or peat moss. Plant the bushes at the same depth as they were in their nursery containers.

Watering and Mulching:

  • Blueberries require consistent moisture, especially during the fruiting season. Water deeply and regularly to keep the soil evenly moist but not waterlogged. Apply a layer of organic mulch around the plants to conserve moisture, suppress weeds, and regulate soil temperature.

Fertilizing:

  • Blueberries have specific nutritional requirements. Use a balanced, acid-loving fertilizer formulated for blueberries or apply a slow-release fertilizer according to package instructions. Avoid over-fertilizing, as it can lead to excessive foliage growth and poor fruiting.

Pruning Blueberry Bushes:

  • Prune blueberry bushes during late winter or early spring to remove dead, damaged, or crossing branches. Pruning also helps maintain an open structure and stimulates new growth.

Protecting from Pests and Diseases:

  • Blueberries are susceptible to certain pests like birds, aphids, and fruit flies. Use netting or bird deterrents to protect your fruit. Monitor for pests and diseases, and take appropriate measures, such as organic insecticides or cultural practices, to address any issues.

Harvesting Blueberries:

  • Blueberries are typically ready for harvest when they have turned fully blue and are easily detached from the plant with a gentle twist. Harvest in the morning when the berries are cool. Avoid picking unripe berries as they may not develop their full sweetness.

Storing Blueberries:

  • Blueberries are best consumed fresh but can also be stored in the refrigerator for up to two weeks. For long-term storage, freeze the berries by spreading them on a baking sheet and then transferring them to a freezer-safe bag.

Gardeners’ Note

Blueberries benefit from cross-pollination, so consider planting multiple varieties for better fruit set. Prune mature blueberry bushes more heavily to promote new growth and maintain productivity.

Conclusion

By following these step-by-step instructions and paying attention to important gardeners’ notes, you can successfully grow and harvest your own delicious blueberries. From selecting the right varieties to providing optimal growing conditions, regular care, and proper pruning, you’ll be rewarded with a plentiful supply of sweet and nutritious berries to enjoy fresh or use in a variety of culinary delights.

How to Prune Roses

Overview

Pruning roses is an essential task that promotes healthy growth, encourages abundant blooms, and helps maintain the shape and vigor of your rose bushes. While it may seem intimidating at first, with the right techniques and tools, anyone can successfully prune roses. In this article, we will provide you with a step-by-step guide on how to prune roses effectively, along with some valuable gardeners’ notes to ensure your roses flourish.

Step-by-Step Guide to Pruning Roses

  1. Timing: Pruning roses is typically done during late winter or early spring, before new growth emerges. This dormant period allows for better visibility of the plant’s structure and reduces the risk of interfering with new buds.
  2. Tools Needed:
  • Clean, sharp pruning shears or secateurs: Choose a reliable pair of pruning shears with a bypass cutting action for clean cuts.
  • Long-handled loppers: These are useful for cutting thick canes or branches.
  • Thick gloves: Wear protective gloves to safeguard your hands from thorns.
  • Disinfectant: Before pruning each rose bush, disinfect your tools to prevent the spread of diseases.

Gardeners’ Note

Observe the rose bush: Before making any cuts, assess the overall health and structure of the rose bush. Identify dead or damaged wood, crossing branches, and overcrowded growth that needs to be removed.

Remove dead or damaged wood: Locate any dead or diseased wood and cut it back to healthy tissue. Make a clean cut at a 45-degree angle, just above an outward-facing bud or leaf node.

Remove weak and crossing branches: Identify weak, thin, or spindly branches that are unlikely to produce healthy blooms. Cut them back to the base or to a strong, healthy bud.

Promote air circulation: Remove any branches that are crossing or rubbing against each other. This will improve air circulation within the bush and reduce the risk of fungal diseases.

Shape the rose bush: To shape the bush and encourage outward growth, prune above an outward-facing bud or leaf node. This directs growth away from the center and prevents overcrowding.

Reduce the height: If desired, prune the overall height of the rose bush by cutting back tall canes to an appropriate height. Aim to maintain an open and balanced shape.

Clean up and dispose: Gather all the pruned branches and plant debris, ensuring that any diseased material is disposed of properly. Clean and disinfect your tools to prevent contamination.

Gardeners’ Note

Regular pruning encourages vigorous growth and larger blooms. Don’t be afraid to prune your roses more heavily if necessary, especially for hybrid tea and floribunda varieties.

How to Grow and Care for Onions

Introduction

Onions are a versatile and essential ingredient in many culinary dishes, providing flavor and aroma to countless recipes. Growing your own onions can be a rewarding experience, as they are relatively easy to cultivate and require minimal space. In this article, we will explore the basics of growing and caring for onions, including different onion types, ideal growing conditions, and important care tips to ensure a successful harvest of fresh and flavorful onions.

Types of Onions

There are several types of onions, each with its own flavor profile and best usage. Common onion types include:

  • Yellow Onions: These are the most widely used onions with a strong and pungent flavor. They are great for cooking and can be stored for long periods.
  • Red Onions: Red onions have a milder flavor and a vibrant color. They are often used raw in salads or as a garnish.
  • White Onions: White onions have a milder taste compared to yellow onions and are commonly used in Mexican and Southwestern cuisine.
  • Sweet Onions: As the name suggests, sweet onions have a mild and sweet flavor. They are delicious when eaten raw in salads or on burgers.

Growing Conditions

  • Soil: Onions prefer well-draining soil rich in organic matter. Prepare the soil by adding compost or well-rotted manure before planting to improve fertility.
  • Sunlight: Onions thrive in full sun, requiring at least 6 hours of direct sunlight daily for optimal growth and bulb development.
  • Temperature: Onions are cool-season crops and can tolerate chilly weather. They grow best in temperatures between 55-75°F (13-24°C).
  • Watering: Onions require consistent moisture but should not be overwatered. Water deeply once a week, ensuring the soil is evenly moist but not waterlogged.

Caring Notes

  • Planting: Onion sets (small bulbs) or onion transplants can be planted in early spring. Space them about 4-6 inches apart, with the pointed end facing up and the tip of the bulb level with the soil surface.
  • Mulching: Apply a layer of organic mulch, such as straw or grass clippings, around the onion plants to suppress weeds and retain soil moisture.
  • Fertilizing: Onions are light to moderate feeders. Apply a balanced fertilizer or compost during planting, and side-dress with nitrogen-rich fertilizer when the plants reach about 6 inches in height.
  • Weed Control: Keep the onion bed weed-free by regularly removing weeds. Be careful not to damage the shallow onion roots while weeding.
  • Thinning: Thin the onion seedlings if they appear crowded, allowing sufficient space for bulb development. Use the thinned seedlings as green onions in cooking.
  • Pests and Diseases: Common onion pests include onion flies and onion thrips. Monitor your plants regularly and take appropriate measures such as insecticidal soap or organic insecticides if necessary. Diseases like fungal rot can be minimized by providing good air circulation and avoiding overwatering.

Conclusion

Growing and caring for onions is a rewarding endeavor that allows you to enjoy fresh and flavorful additions to your meals. By understanding different onion types, providing suitable growing conditions, and following proper.

How to Grow and Care for Microgreens

Introduction

Microgreens, tiny edible greens harvested at an early stage of growth, have gained popularity in recent years due to their intense flavors, vibrant colors, and impressive nutritional profiles. These young seedlings offer a concentrated burst of nutrients and can be grown easily at home, even in small spaces. In this article, we will explore the basics of cultivating microgreens, including how to grow and care for them. We’ll also discuss important considerations and provide answers to frequently asked questions to help you successfully grow your own delicious and nutritious microgreens.

About Microgreens

Microgreens are essentially the seedlings of vegetables and herbs that are harvested when they have developed their first true leaves. They are packed with vitamins, minerals, and antioxidants, making them a valuable addition to salads, sandwiches, and smoothies. Popular microgreens include kale, broccoli, radish, sunflower, and basil, among others. These tiny greens offer intense flavors and can be grown in a matter of weeks, making them an excellent choice for home gardeners and culinary enthusiasts.

How to Grow Microgreens

2.1 Seed Selection: Choose high-quality seeds specifically labeled for microgreen production. Look for varieties that are known for their flavor and color, ensuring they are safe for consumption at the microgreen stage.

2.2 Growing Medium: Select a suitable growing medium such as a seedling mix, coconut coir, or vermiculite. Fill shallow trays or containers with the growing medium, ensuring good drainage.

2.3 Sowing and Germination: Evenly spread the seeds over the growing medium, ensuring they are not overcrowded. Gently press the seeds into the surface of the medium, mist with water, and cover with a breathable lid or plastic wrap to create a greenhouse-like environment for germination.

2.4 Light and Temperature: Place the trays in a well-lit area, preferably near a south-facing window or under grow lights. Microgreens thrive in temperatures between 60-75°F (15-24°C), so maintaining a consistent temperature is crucial for successful growth.

2.5 Watering: Water the microgreens gently, preferably from the bottom, to avoid disturbing the seeds. Keep the growing medium evenly moist but not waterlogged. Avoid overwatering, as it can lead to fungal diseases.

2.6 Harvesting: Microgreens are typically ready for harvest within 1-3 weeks, depending on the variety. Use scissors or a sharp knife to cut the greens just above the soil level when they have developed their first true leaves. Rinse and pat them dry before consuming.

How to Care for Microgreens

3.1 Light: Microgreens require adequate light to develop vibrant colors and flavors. If natural light is insufficient, provide 12-16 hours of artificial light using fluorescent or LED grow lights placed a few inches above the greens.

3.2 Air Circulation: Good air circulation helps prevent diseases. Use a small fan or gently move the air around the microgreens periodically.

3.3 Fertilizing: Microgreens generally don’t require additional fertilizer. The nutrients present in the growing medium are usually sufficient for their short growth cycle. However, if you choose to fertilize, use a diluted organic liquid fertilizer.

3.4 Pest Control: Monitor the microgreens for any signs of pests like aphids or fungal diseases. If necessary, use organic pest control methods such as neem oil or insecticidal soap to address the issue.

What to Consider

4.1 Growing Space: Microgreens can be grown in small spaces, including windowsills, balconies, or countertops. Consider the available space and choose varieties that fit well within the limitations.

4.2 Succession Planting: To ensure a continuous supply of fresh microgreens, practice succession planting by sowing new trays every few days.

Frequently Asked Questions (FAQs)

Q1: Can I use regular vegetable seeds to grow microgreens?

A1: While regular vegetable seeds can be used for microgreens, it’s recommended to use seeds specifically labeled for microgreen production. These seeds are typically untreated and selected for their flavor and quality at the microgreen stage.

Q2: How long do microgreens last after harvesting?

A2: Microgreens are best consumed fresh, ideally within a few hours of harvesting. However, they can be stored in a refrigerator for a few days in a sealed container or bag with a paper towel to absorb excess moisture.

Q3: Can I reuse the soil for growing microgreens?

A3: It’s generally not recommended to reuse the growing medium for microgreens due to the risk of disease and nutrient depletion. Start with fresh, sterile medium for each batch of microgreens.

Q4: Can I grow microgreens without soil?

A4: Yes, microgreens can be grown hydroponically or using other soilless methods. In such cases, a growing medium like coconut coir or vermiculite is used to support the roots.

Conclusion

Growing your own microgreens is a simple and rewarding way to add fresh and nutritious greens to your meals. By selecting quality seeds, providing proper lighting and temperature, and practicing good care techniques, you can enjoy a continuous harvest of flavorful and nutrient-rich microgreens. 

Remember to consider factors like seed selection, lighting, and watering while ensuring good air circulation and addressing any pest or disease issues. With a little attention and effort, you’ll be able to elevate your culinary creations with the vibrant colors and flavors of homegrown microgreens.

How To Grow and Care for Lavender

Introduction

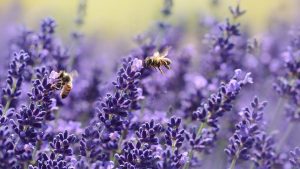
Lavender, with its beautiful purple flowers and enchanting fragrance, is a versatile and beloved plant. Whether you’re a seasoned gardener or just starting out, growing and caring for lavender can be a rewarding experience. In this article, we will explore the basics of cultivating lavender, including how to grow and care for this aromatic herb. We’ll also address common considerations and provide answers to frequently asked questions to help you achieve success in cultivating lavender.

About Lavender

Lavender (Lavandula) is a perennial plant that belongs to the mint family, Lamiaceae. It is native to the Mediterranean region and is renowned for its vibrant flowers, fragrant aroma, and numerous uses. Lavender is widely cultivated for its essential oils, culinary purposes, and decorative appeal. With over 450 known varieties, lavender offers a wide range of options to suit different climates and preferences.

How to Grow Lavender

2.1 Choosing the Right Variety: Select a lavender variety that is well-suited for your climate and growing conditions. English lavender (Lavandula angustifolia) and lavandin (Lavandula x intermedia) are popular choices, but there are many other options available.

2.2 Location and Soil: Lavender thrives in full sunlight, so choose a location that receives at least 6-8 hours of direct sunlight per day. The soil should be well-draining and slightly alkaline with a pH level between 6.5 and 7.5. If your soil is heavy or clay-like, consider amending it with organic matter to improve drainage.

2.3 Planting: Lavender can be propagated from seeds, cuttings, or purchased plants. Spring or fall is the best time to plant lavender. Space the plants 12-18 inches apart to allow for good air circulation and prevent fungal diseases.

2.4 Watering: Lavender is drought-tolerant once established, so it’s important not to overwater. Water deeply but infrequently, allowing the soil to dry out between waterings. Avoid wetting the foliage to prevent diseases.

2.5 Pruning: Regular pruning is essential to maintain the shape and health of lavender plants. Prune in early spring, cutting back around one-third of the plant’s height. This encourages new growth and prevents the center of the plant from becoming woody and unproductive.

How to Care for Lavender

3.1 Fertilizing: Lavender doesn’t require heavy feeding. A light application of balanced organic fertilizer in early spring is usually sufficient. Avoid excessive nitrogen, as it can promote excessive leaf growth at the expense of flowers.

3.2 Mulching: Apply a thin layer of organic mulch, such as straw or wood chips, around the base of lavender plants to conserve moisture, suppress weed growth, and insulate the roots during winter.

3.3 Pest and Disease Control: Lavender is generally resistant to pests and diseases, but it can occasionally face issues like root rot, powdery mildew, or aphids. To prevent these problems, ensure proper drainage, provide good air circulation, and monitor your plants regularly. Organic insecticidal soaps or neem oil can be used if pest infestations occur.

3.4 Winter Care: Lavender is hardy in many regions but can be susceptible to winter damage. In colder climates, provide protection by applying a layer of mulch around the base of the plant and avoid excessive moisture during the winter months.

What to Consider

4.1 Harvesting: Lavender blooms in summer, and the flowers can be harvested when they are in full bloom. Cut the flowers in the morning after the dew has dried, and hang them upside down in a cool, dark place to dry.

4.2 Uses of Lavender: Lavender has various uses, including crafting potpourri, sachets, essential oils, culinary creations, and medicinal remedies. Explore the possibilities and enjoy the benefits of this versatile herb.

Frequently Asked Questions (FAQs)

Q1: How long does it take for lavender to grow from seed?

A1: Lavender grown from seeds typically takes 2-3 years to reach maturity and produce flowers. Consider using cuttings or purchased plants for faster results.

Q2: How often should I water lavender?

A2: Lavender prefers dry conditions and should be watered deeply but infrequently. Watering once every 1-2 weeks should be sufficient, depending on your climate and soil type.

Q3: Can lavender be grown indoors?

A3: While lavender prefers outdoor conditions, it can be grown indoors if provided with bright light, good air circulation, and well-draining soil. Consider using grow lights to supplement natural sunlight.

Q4: How do I prune lavender?

A4: Prune lavender in early spring, cutting back about one-third of the plant’s height. Trim just above a set of healthy leaves and avoid cutting into woody stems.

Conclusion

Growing and caring for lavender can be a delightful experience for any gardener. By selecting the right variety, providing optimal growing conditions, and following proper care techniques, you can enjoy the beauty and aroma of lavender in your garden. Remember to consider factors such as watering, pruning, and pest control, and explore the various uses of lavender to make the most of this versatile herb. With a little patience and attention, you’ll be rewarded with a thriving lavender garden that adds beauty and fragrance to your surroundings.